I've been tanker foiling in Galveston Bay twice, and both trips taught me something different. The first was mostly about figuring out the spot and my setup. The second, with a different foil underneath me, felt much closer to what I had pictured: finding a ship's wave and letting it carry me across the bay.
This is how we've approached it so far, from where we launch to the wind and equipment I would look for next time. It's a starting point from my own experience, rather than a promise that every ship or every day will deliver.
What is tanker foiling?
You're riding the waves created by large ships traveling through the bay. We use a jet ski for support and getting around, then ride the ship-generated waves on a hydrofoil. The attraction is the wave itself: you don't need a windy day to make it happen. In fact, I want the opposite.
You should already be comfortable controlling your foil and working with your support driver before taking this into a busy bay. Learning the equipment and learning the ship traffic at the same time is a lot to take on.
Why the waves break beside the channel
The Houston Ship Channel is dredged so these massive ships can pass through deeper water. Along either side of the sections marked on my map, the bay becomes much shallower. In some places we've found water shallow enough to stand in at about chest depth.
That's the kind of shallow shelf I look for when searching for bigger waves. The ship's bow waves spread outward from the front of the ship. As they move out of the deeper channel and over those shallow sections, they can steepen and start to break. The transition in depth helps shape the ride.
Chest-deep water is an observation from our trips, not a fixed depth across the marked areas. Tide and location change the water depth, and you still need enough clearance for your foil.
Give yourself two days
If you're planning your first tanker foiling trip, I would recommend two days. Give yourself the first day to learn how it works: watch the ships and their waves, figure out where to position outside the channel, get comfortable working with your jet ski driver, and dial in your foil setup. That gives you a second day to put what you've learned into practice, rather than feeling rushed to figure everything out in one session. Choose days with suitable conditions.
Bring four people, two jet skis, and supplies
Start each day with a full tank of gas in each jet ski. You'll be traveling between spots, waiting for ships, and supporting riders for much of the day. Keep an eye on fuel throughout the session and leave enough reserve to return to the ramp.
For this kind of day, four people is my ideal crew: two people per jet ski, with two jet skis total. That gives you people to share driving and riding duties and support each other on the water.
I strongly recommend a rescue sled on the back of each jet ski. I didn't bring rescue sleds on either of my two trips, but I definitely will in the future. Without them, moving and carrying the foil setup on the jet skis tended to scratch the board, the foil, and the jet skis, no matter how carefully we tried to avoid it.
Being able to carry the foil on a rescue sled would make handling the setup much easier and help keep the equipment from rubbing against the jet ski. That's the main reason I want sleds for the next trip: easier carrying and fewer scratches.
Pack plenty of drinking water and a cooler with food. Plan for most of the day on the bay, not a quick session where you'll be back at the ramp before you need to eat or drink.
Texas City Dike: the kiddie pool
Launch address: Dike Road, Texas City, TX 77590. Use the bay-side Noah J. Welch ramp partway along the dike.
Cost: Budget $10 per vehicle to access the launch on standard summer weekends. The city's fee schedule lists this as a dike entry fee for non-residents, with $20 per vehicle per day on holiday weekends and free access during winter and non-holiday summer Mondays through Thursdays. Residents with a current sticker have free access.
One of our launches is the boat ramp on the bay side of the Texas City Dike, roughly halfway out. From there, our run toward the edge of the channel is about a mile. Those are my estimates from our trips, not precise navigation directions.
We call this section the kiddie pool. We position outside the channel and wait for ships traveling in either direction, then look for their waves. It's the more approachable of the two areas we've ridden, but the nickname doesn't make it a sheltered beginner spot. You're still sharing the bay with commercial traffic.
The waiting is part of it. A passing ship doesn't automatically mean a good ride, and I would rather let an opportunity go than scramble into the wrong position.
Topwater Grill and Blue Water Atoll
Launch address: 815 Avenue O, San Leon, TX 77539.
Boat ramp use: $5 — the launch fee we budget for Topwater Grill.
Our other launch is at Topwater Grill, and from there we head toward Blue Water Atoll. This is where we've found the bigger waves, with a much less forgiving shoreline.
The waves break toward the island, and that edge has rocks. If you fall, the water can push you toward them. That's the main difference I would want someone to understand before choosing this spot just because the waves are larger.
Watch what the waves are doing before committing, keep room between yourself and the rocky edge, and work with your support driver on where a pickup can happen. If there isn't space to fall and recover clear of the rocks, pass on the ride.
Map: our launches and riding areas
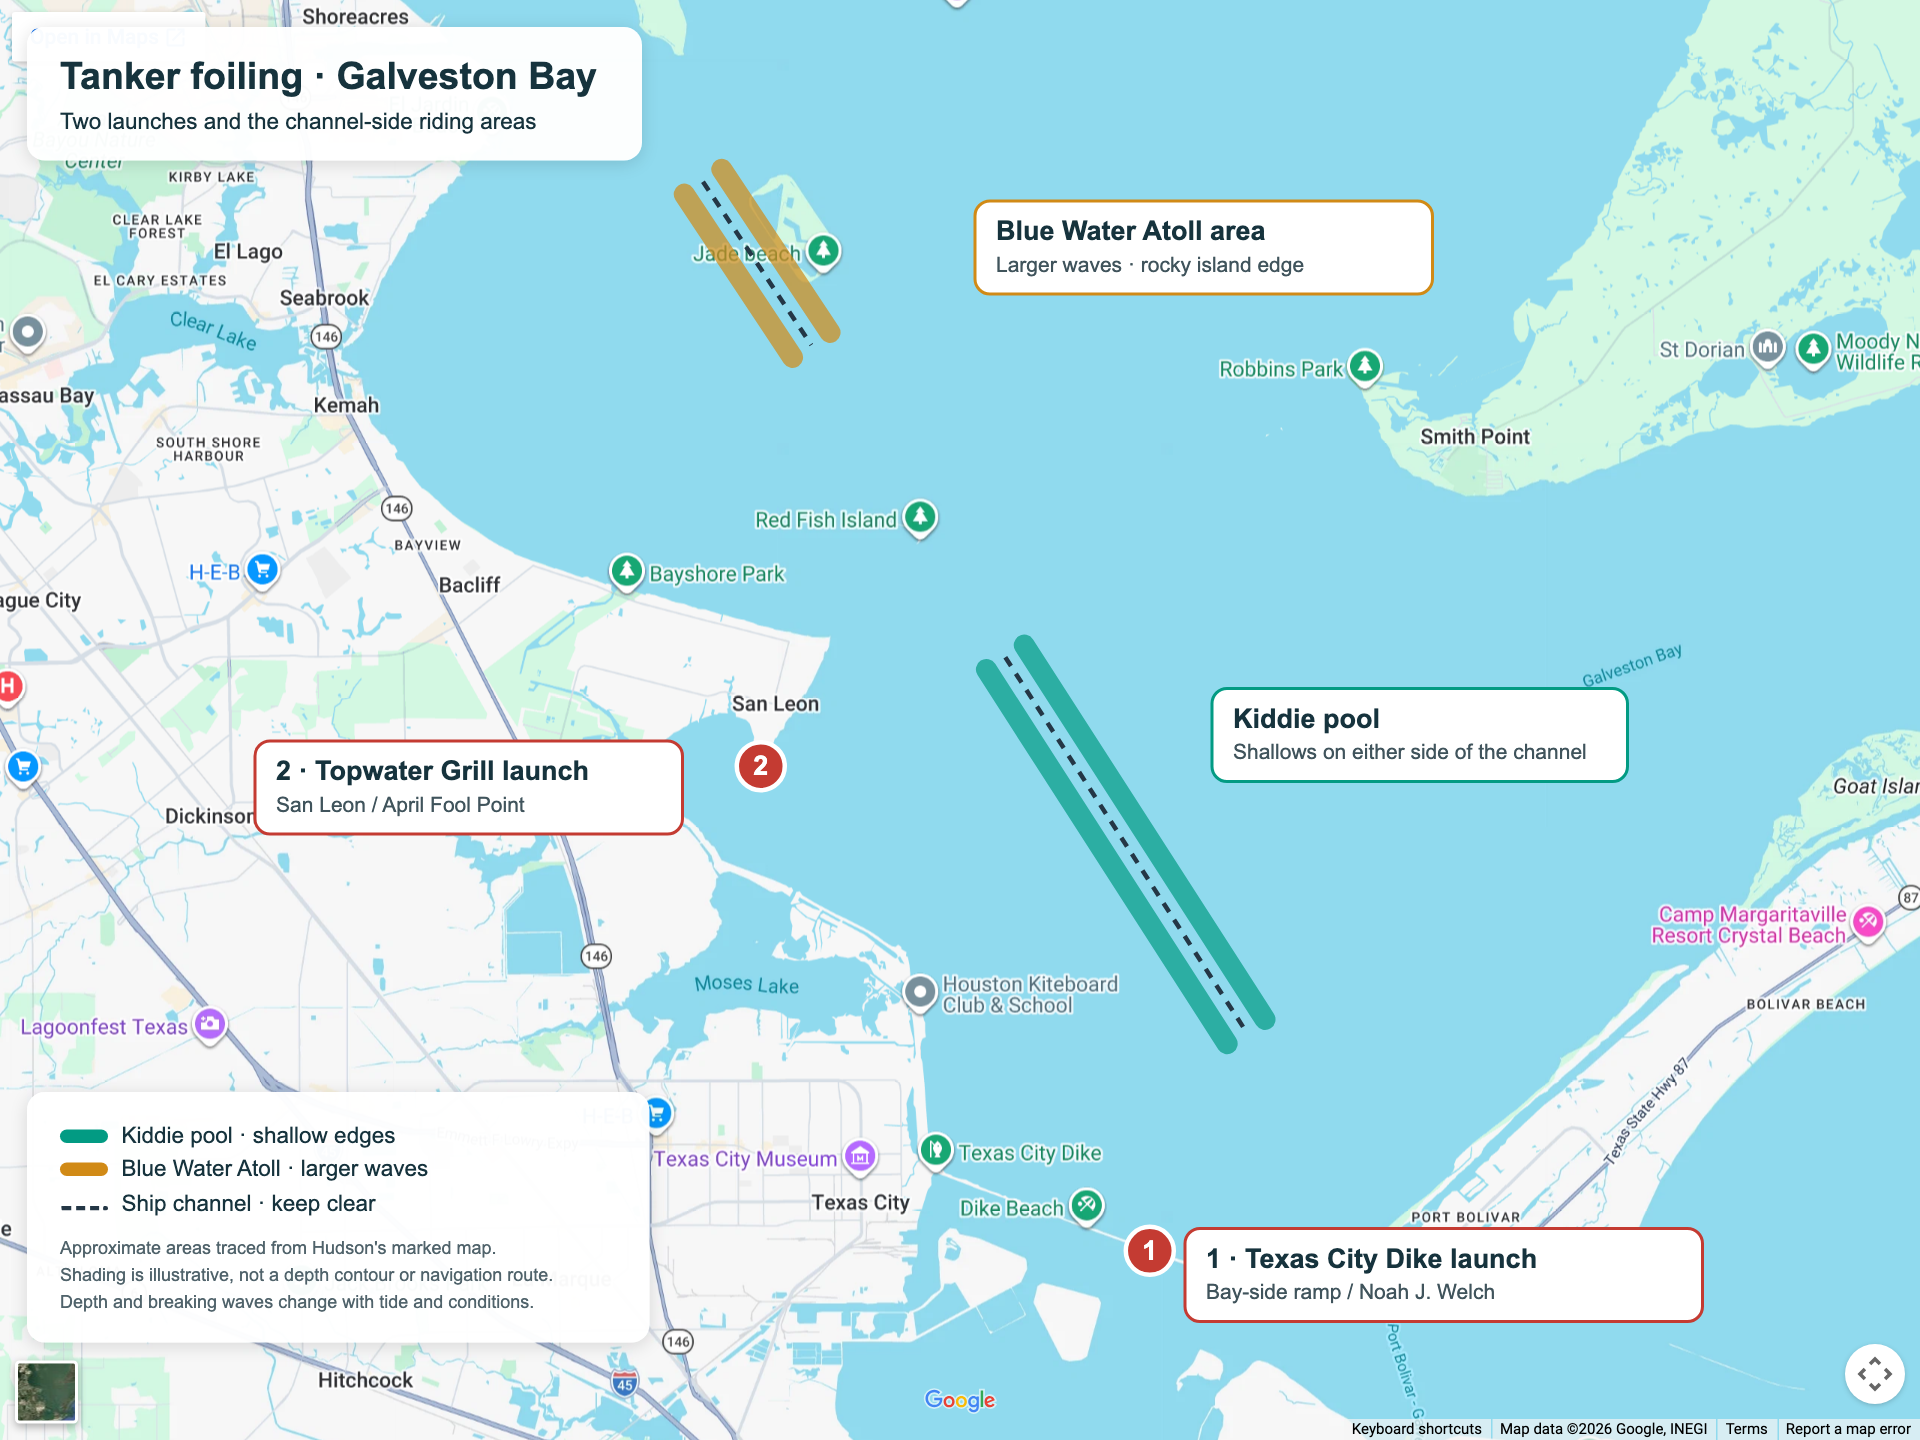
Open the full-size map. Basemap: Google Maps; the approximate riding areas follow my marked sketch.
- 1 — Texas City Dike: the bay-side launch partway out along the dike. Open the ramp in Google Maps.
- 2 — Topwater Grill: our other launch in San Leon. Open the launch area in Google Maps.
- Green — the kiddie pool: the shallow channel-side sections shown on my sketch.
- Gold — the Blue Water Atoll area: the larger-wave section near the rocky island edge.
The dashed lines indicate the channel through each approximate section; the colored bands mark the shallower sides where we look for waves. These markings aren't depth contours or a navigation route. Stay clear of the channel while waiting and riding.
The wind, tide, and ships I look for
My preference is wind below 10 mph. Below 5 mph is what I would call ideal: less wind chop makes it easier to see and ride the ship's wave. That's my preference from these sessions, not a guarantee of perfect conditions.
Low tide is also my preference for tanker foiling here. I'd look for that along with the light wind when choosing a day. It doesn't remove the need to check water depth and leave room around the rocky shoreline.
For ships, I look for more draft: more of the hull sitting below the water. Heavier, deeper-running ships traveling above about 10 knots are the ones I would pay attention to. I treat those as clues, not a formula. A ship's size or speed alone doesn't tell you exactly what wave you'll get where you're waiting.
I wouldn't chase a ship to force a session. Find a sensible position outside the channel, watch the traffic, and let the opportunities come to you.
Track the ships with MarineTraffic

I use MarineTraffic to track the ships, and it's one of my most useful tools for planning the day. Its live map lets me see which ships are moving through Galveston Bay and check their information before deciding where to wait outside the channel.
The details I look for are reported draft, speed, and available size or weight information, such as deadweight tonnage (DWT). MarineTraffic's vessel details include speed, draft, and DWT, depending on the available data and access. DWT describes carrying capacity; it doesn't tell you exactly how much the ship weighs with its current load.
There is a free version for basic tracking, and I think a paid plan is worth it for planning a tanker foiling day. My rough estimate was about $10 a year, but check the current in-app price and included features before subscribing: MarineTraffic's mobile plans have changed.
The updates can be near real time, but coverage and update frequency vary. Check the timestamp on a ship's position, and keep watching the actual traffic around you while using the app to plan.
Keep clear of the channel
While we're waiting, moving along the area, or riding, we stay outside the channel. A jet ski is still a vessel; being small and maneuverable doesn't give it priority over a ship that needs the channel.
If a crossing is necessary, wait until the traffic is clear and make a direct crossing, rather than traveling diagonally along the channel. Don't cross ahead of an approaching ship or make it alter course for you. Keep the rider and support craft clear together.
The US Coast Guard's navigation rules, particularly Rule 9 on narrow channels, explain the obligation not to impede vessels that can safely navigate only within the channel. Read them before heading out, and check current charts, weather, and local notices when planning your trip.
Dolphins and jellyfish
One of the highlights of our trips was seeing plenty of dolphins throughout the bay. Keep an eye out while you're on the water; you may see them during your session too. Give them space and enjoy watching without chasing or approaching them.
Also, watch out for jellyfish. They were few and far between when we went, but they are out there in the bay. Keep that in mind when you're in the water after a fall or getting back onto the jet ski, and avoid touching any you see.
What I rode on my first trip
My first setup was an AXIS Spitfire 780, a 75 cm mast, and a board with straps.
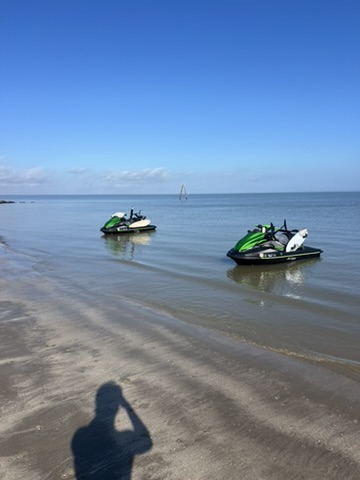
First trip: our jet skis and foil boards on the bay.
The front wing felt a little small for me in that session. I can't put that entirely on the wing: my pumping, the straps, and the rest of the setup could all have played a part. I wouldn't call it a bad foil based on that one outing. I just wasn't connecting everything as well as I wanted.
The 75 cm mast, on the other hand, felt like a good height out there.
My Armstrong setup on the second trip
On my second trip, I rode:
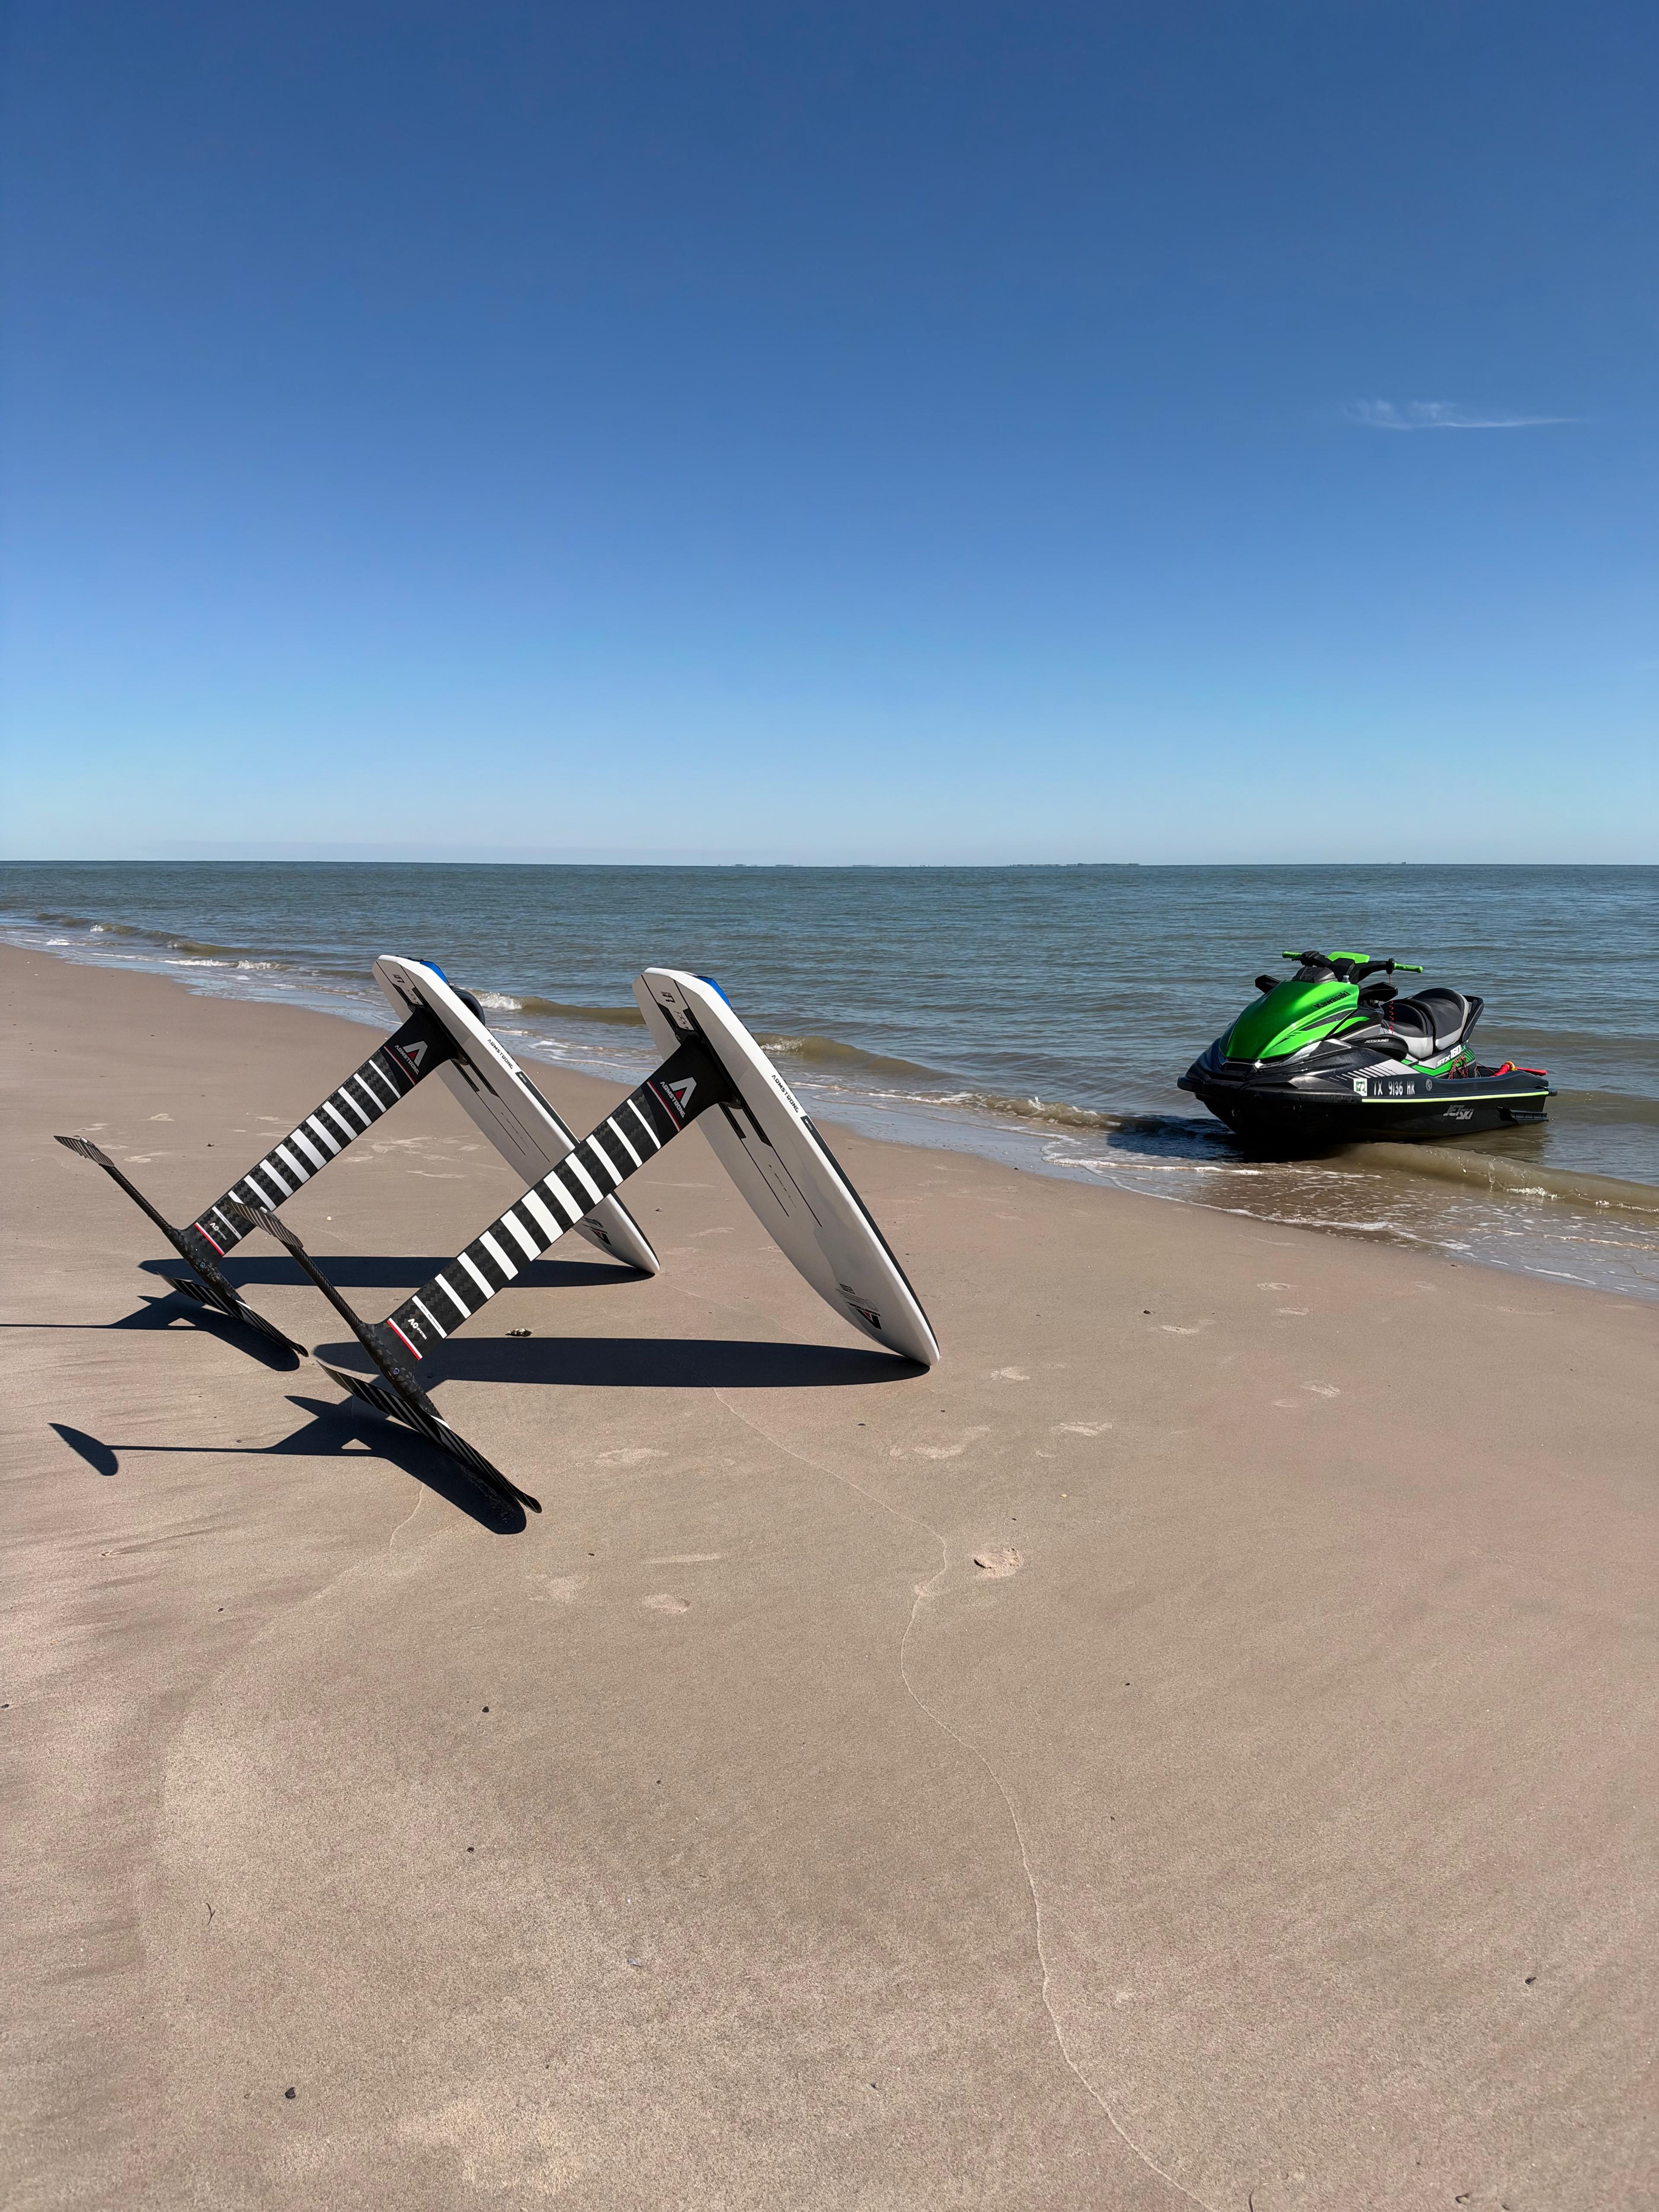
- Armstrong Performance Mk II 795 mm mast, which is 79.5 cm.
- MA790 Mk II front wing.
- 60 cm fuselage.
- Surf 170 Mk II tail.
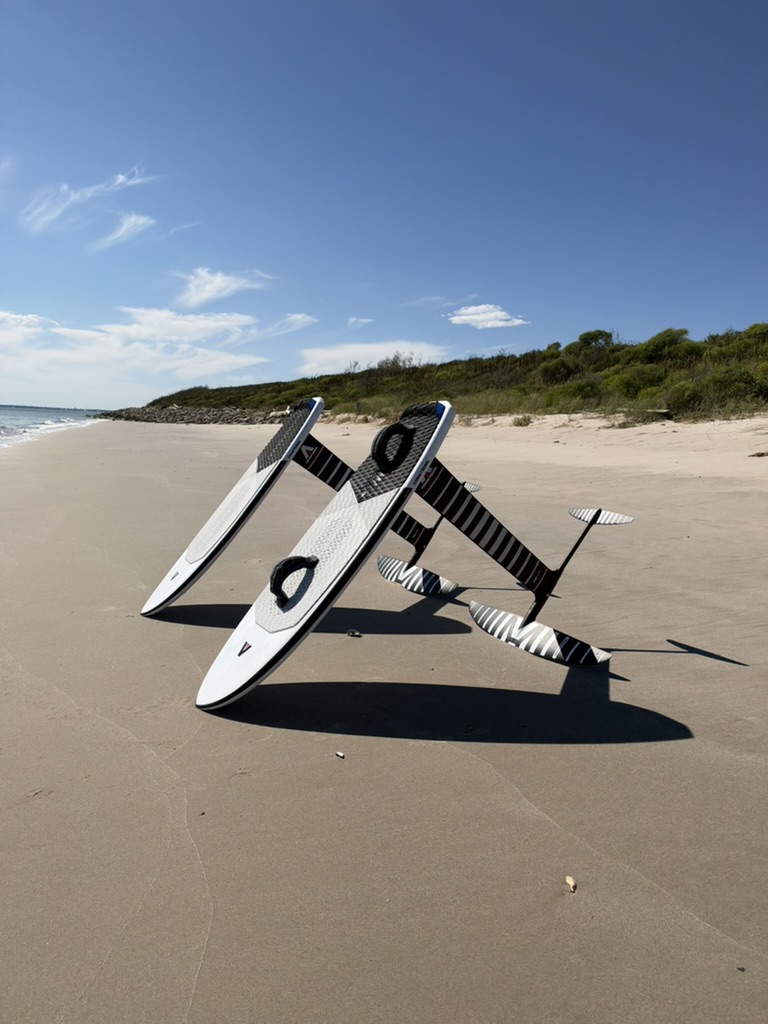
Second trip: the foil setups on the beach. The cover photo with the green jet ski is from this trip too.
For reference, I'm 165 lb and 5′10″. At my size, the MA790 Mk II felt right for me. The 79.5 cm mast was also my preferred height. For this riding, I would personally choose it over going up to roughly 85 cm or down to roughly 72 cm. That is a preference from my setup, rather than a universal limit for the bay.
The other setup on the second trip
The other setup in the second-trip photos was:
- NF Pro board, with no straps.
- 85 cm mast.
- 60 cm fuselage.
- MA990 Mk II front wing.
- Surf 170 Mk II tail.
This is the MA990 Mk II setup we also had out there, alongside my MA790 Mk II setup with the 79.5 cm mast.
What I would choose again
I would happily take the MA790 Mk II back. In my opinion, the MA890 Mk II front wing would be perfect for tanker foiling here. I haven't tested that size on these trips, but it would be my pick for the next one. We also had an MA990 Mk II out there; it worked, but felt a little big for what I wanted.
A smaller HA or UHA is another direction I would consider trying. Those are possible next choices, rather than foils I'm claiming to have tested on these trips. Rider weight, pumping ability, and the wave all matter. Armstrong's MA Mk II sizing guide is useful context when comparing the models.
For my next trip, the wish list is straightforward: very light wind, a setup I can pump comfortably, and enough patience to wait for a good wave with room to ride it.
Videos that inspired these trips
These three videos were part of the inspiration for my tanker foiling trips in Galveston Bay:
- Texas Tanker Boys — Bryan Soderlind.
- Texas Tanker Boys 2 — Bryan Soderlind.
- Foil Wave Pool in TEXAS - Tanker foiling goes off! — jackfromtown.